type
status
date
progress
slug
summary
tags
category
password
URL
icon
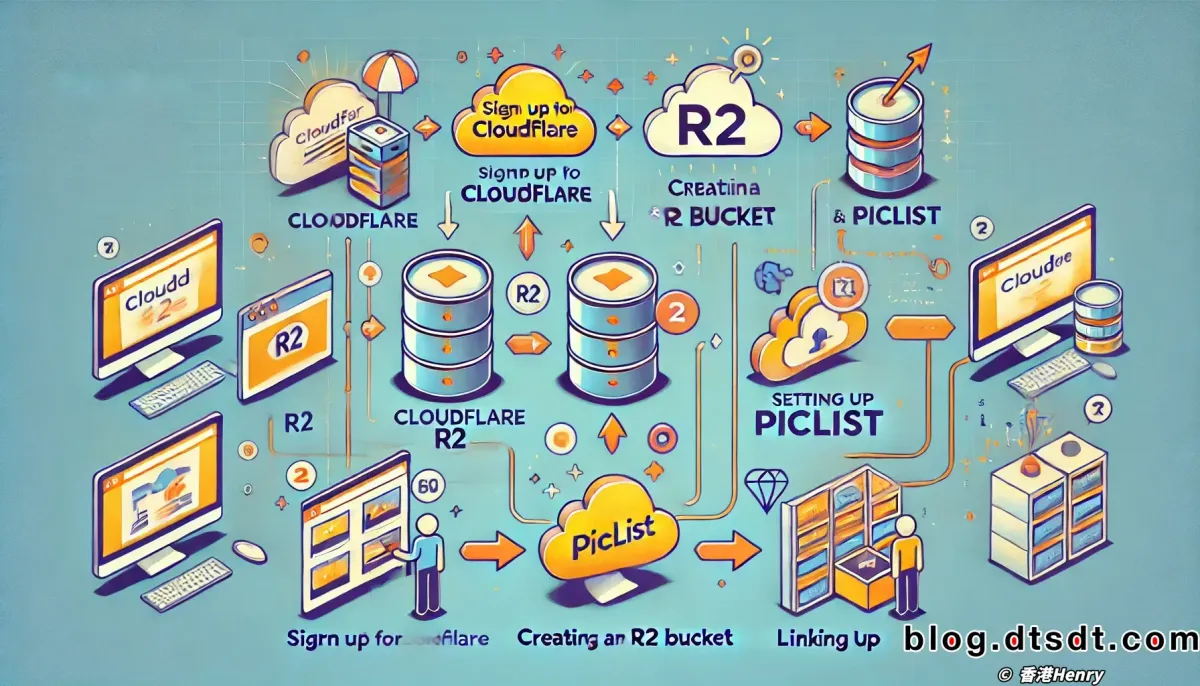
In modern websites and applications, image management is a crucial aspect. An efficient image hosting solution not only speeds up site loading times but also saves bandwidth costs. Additionally, faster loading speeds can enhance SEO, boosting a site’s search engine ranking. Therefore, an image hosting solution is a must-have tool for seasoned bloggers and website owners. Cloudflare R2 and Piclist offer a solution that combines reliability, security, durability, and cost-effectiveness for both individual and business users.
Table of Contents
- Overview
- Advantages of Cloudflare R2 + Piclist Solution
- Suitable Users
- Detailed Configuration Guide
- Step 1: Create a Cloudflare R2 Bucket
- Step 2: Install and Configure Piclist
- Step 3: Connect R2 Bucket to Piclist
- Step 4: Upload Images and Generate Links
- FAQ
- References
- Conclusion
Overview
Cloudflare R2 is an object storage service offered by Cloudflare, providing a decentralized storage solution with no egress fees. Piclist is a lightweight image hosting tool that allows users to manage image uploads and link generation through a simple interface. This solution is particularly suitable for users who need large-scale image storage and global access acceleration, enhancing image distribution efficiency through Cloudflare's global CDN network.
Advantages of Cloudflare R2 + Piclist Solution
1. No Egress Fees
- Cloudflare R2 does not charge for data egress, unlike traditional object storage services like AWS S3. This can save a significant amount of cost, especially for projects with high external access needs. For small companies and individual blogs, this is a cost-effective solution, often providing more than sufficient storage at minimal cost.
2. Global CDN Acceleration
- Cloudflare’s globally distributed CDN ensures fast image loading times worldwide, improving access speed and user experience. This is especially beneficial for websites or applications targeting international markets.
3. High Reliability and Durability
- Cloudflare promises data durability of 99.999999999%, ensuring data security and availability. Regardless of how long images are stored, the probability of data corruption or loss is extremely low, making it a highly reliable choice.
4. Easy Image Management
- Building on PicGo, Piclist offers a straightforward and user-friendly interface for managing image uploads, links, and formatting. It supports Markdown format for easy integration into blogs or other platforms, providing efficient image management for users without technical backgrounds.
5. Highly Flexible Access Control
- Cloudflare R2 supports fine-grained permission control, allowing users to set access policies for images and ensure security. Users can configure public or private access settings, providing robust control over image privacy.
Suitable Users
- Individual Bloggers and Content Creators: Need a stable image hosting solution to store blog images and enjoy accelerated global access without worrying about broken links.
- Small Businesses and Startups: Require a cost-effective, reliable image storage solution to avoid high egress fees typical of traditional object storage services.
- Developers and Technical Teams: Want to leverage Cloudflare R2’s API and flexibility to integrate image hosting into existing applications.
- Cross-border E-commerce or International Business Operators: Need to quickly load product images globally and achieve a stable, fast user experience through Cloudflare’s CDN.
Detailed Configuration Guide
Here’s a step-by-step guide to setting up image hosting using Cloudflare R2 and Piclist:
Step 1: Create a Cloudflare R2 Bucket
Log in to your Cloudflare account.
- Visit Cloudflare’s official website. Register for an account if you don’t have one (preferably with an international email like Gmail).
- Log in to your domain, and if you want to use a custom domain, first add it to Cloudflare and set up DNS resolution.
Navigate to the R2 Storage page and click "Create Bucket".
Since there is a 10GB limit, you need to bind a payment method to continue. Add a credit card/PayPal account.
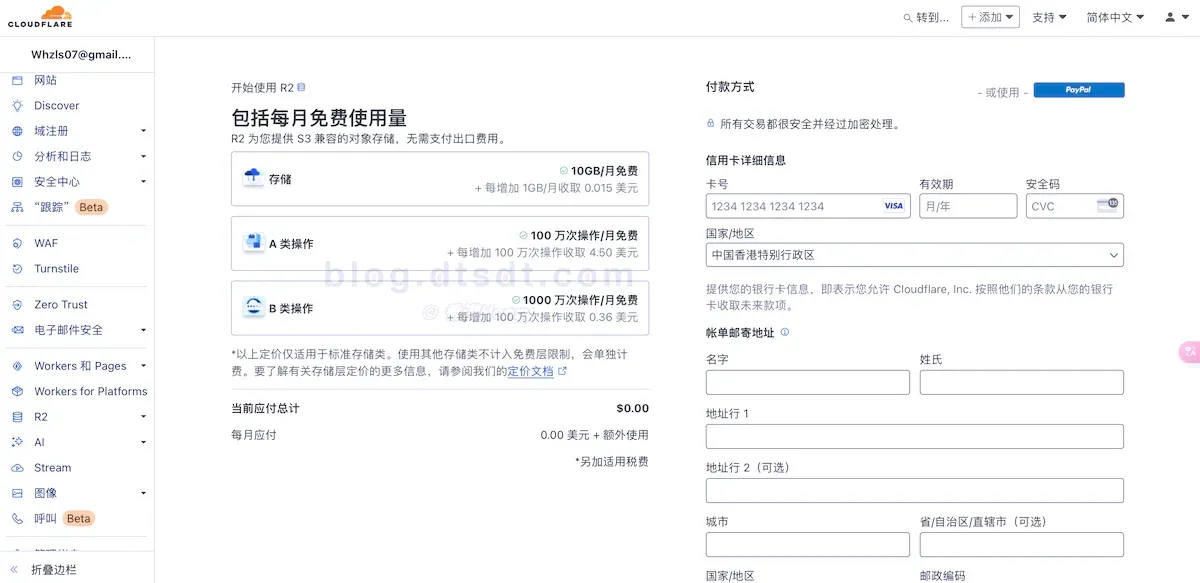
After binding the payment method, create a bucket and generate an API token.
Configure bucket access permissions (public or private).
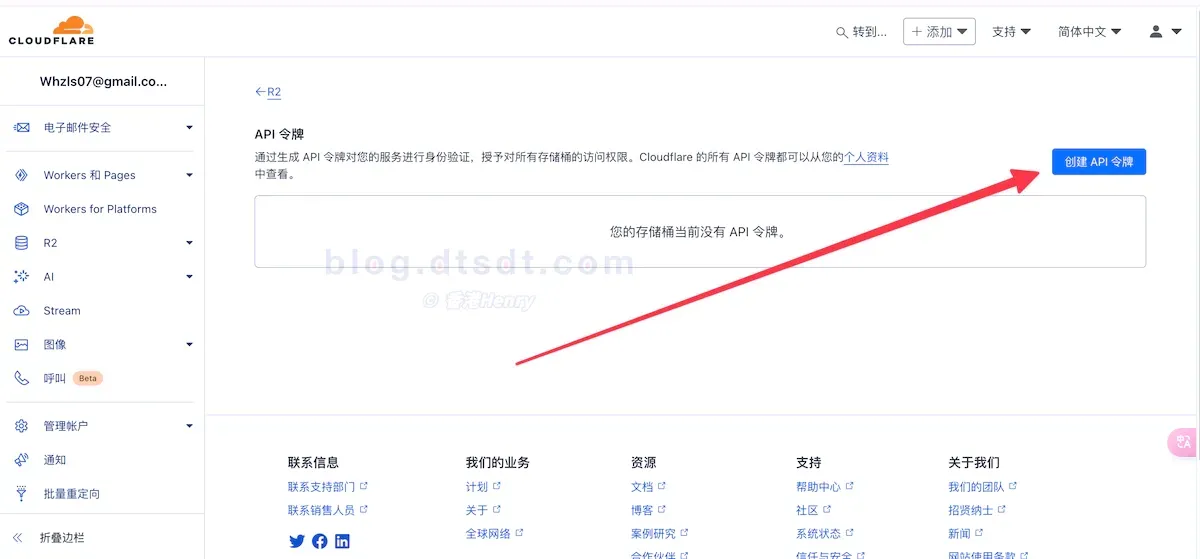
Select the bucket created and name it appropriately, choosing the right storage region.
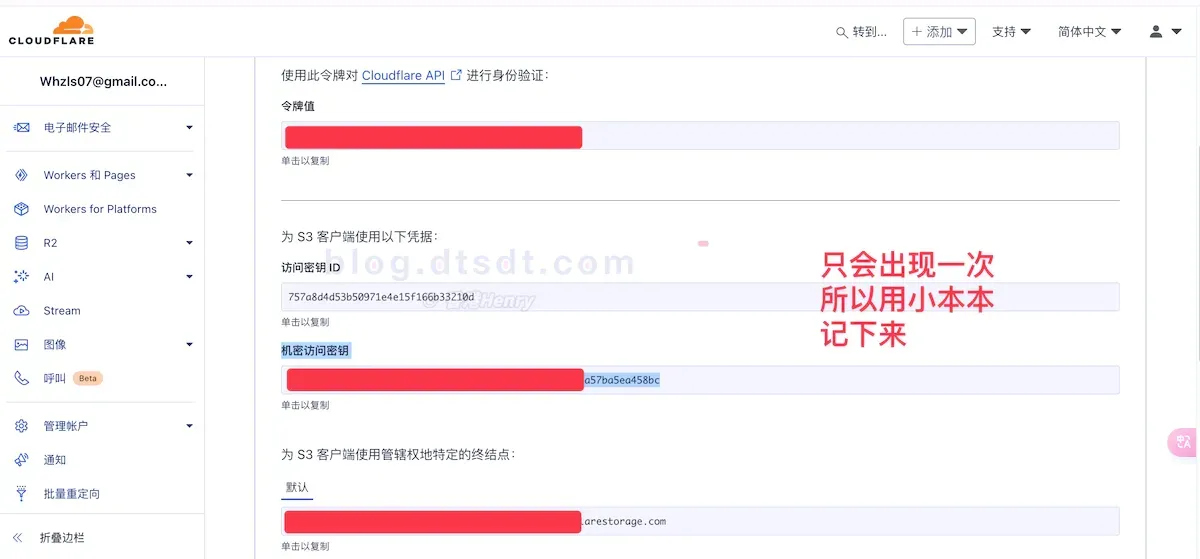
Be sure to note down the access key and access key ID from the generated token, as these are only shown once.
Step 2: Install and Configure Piclist
- Download and install Piclist from GitHub or other sources to get the latest version of the application.
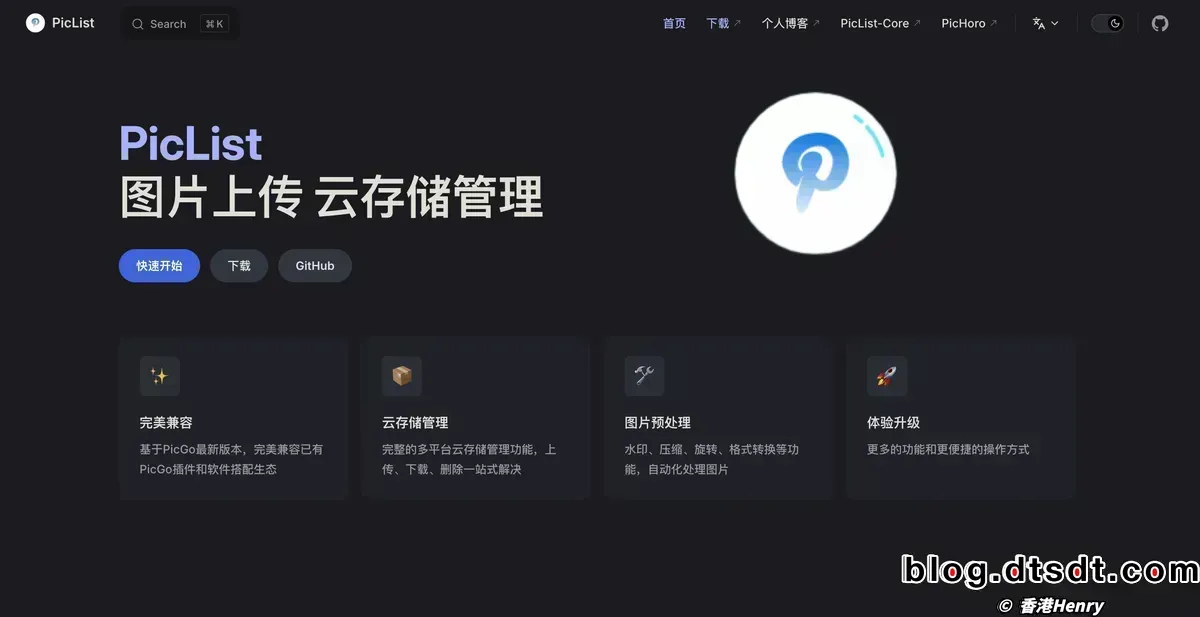
- Run Piclist on your local machine or server, completing basic setup through the command line tool or the application’s interface.
- Open the configuration file and set the basic information for the image hosting service, including name, supported image formats, etc.
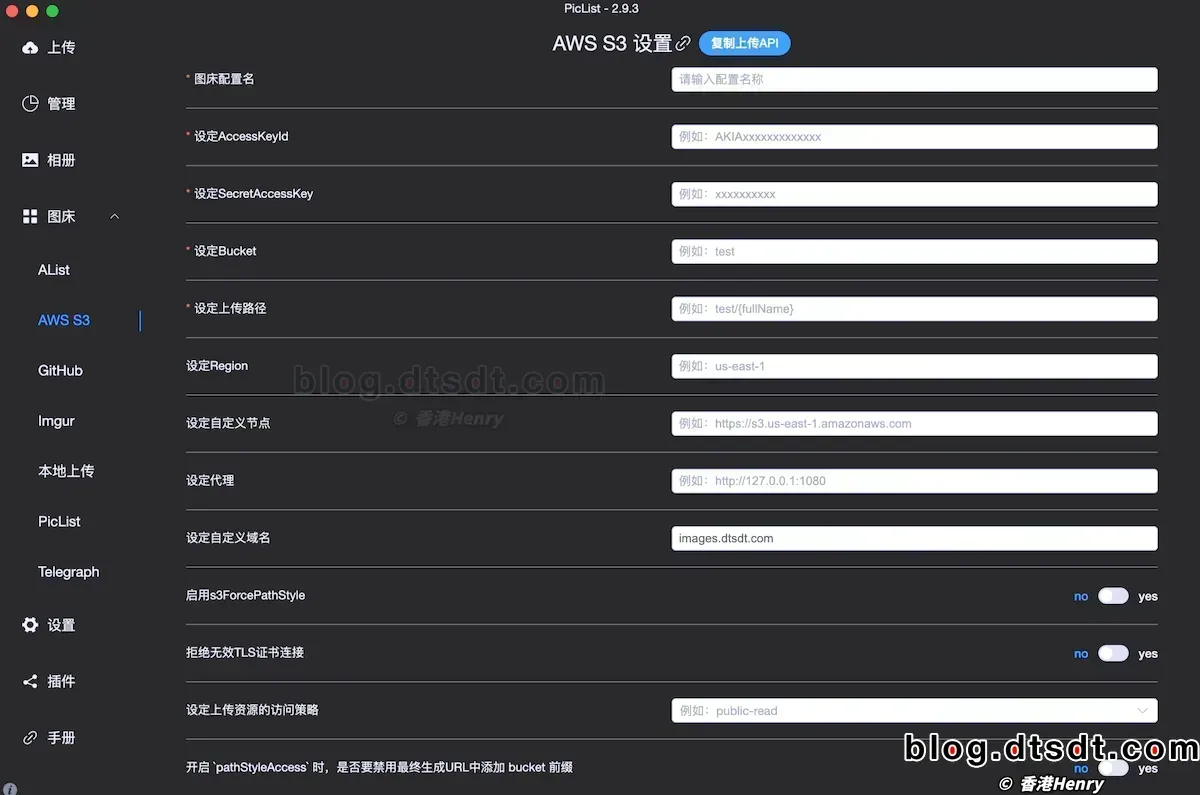
Step 3: Connect R2 Bucket to Piclist
- Enter the API key and R2 bucket access credentials into Piclist.
- In the Piclist configuration file, input Cloudflare R2 details (bucket name, API key, region, etc.).
Pay special attention to:
- Application Key ID: Enter the Access Key ID from the R2 API.
- Application Key: Enter the Secret Access Key from the R2 API.
- Bucket Name: Enter the bucket name you created, such as
yu-r2-test.
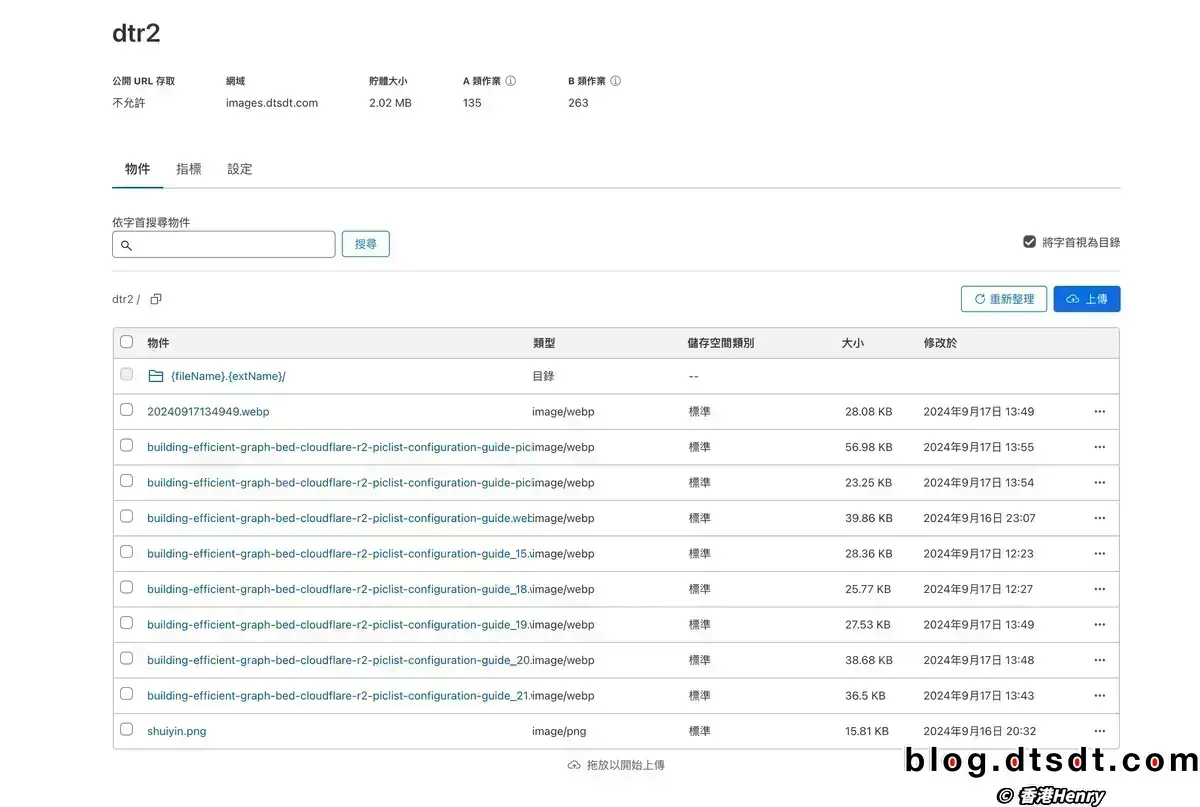
- File Path: Path to the file in R2, such as
{fileName}.{extName}to retain the original file name and extension.
- Custom Endpoint: Enter the S3 endpoint in the format
xxx.r2.cloudflarestorage.com. Ensure you don’t copy extra characters at the end of the link.
- Custom Domain: Enter the domain generated or a custom domain, such as
yu-r2-test.yuming.com.
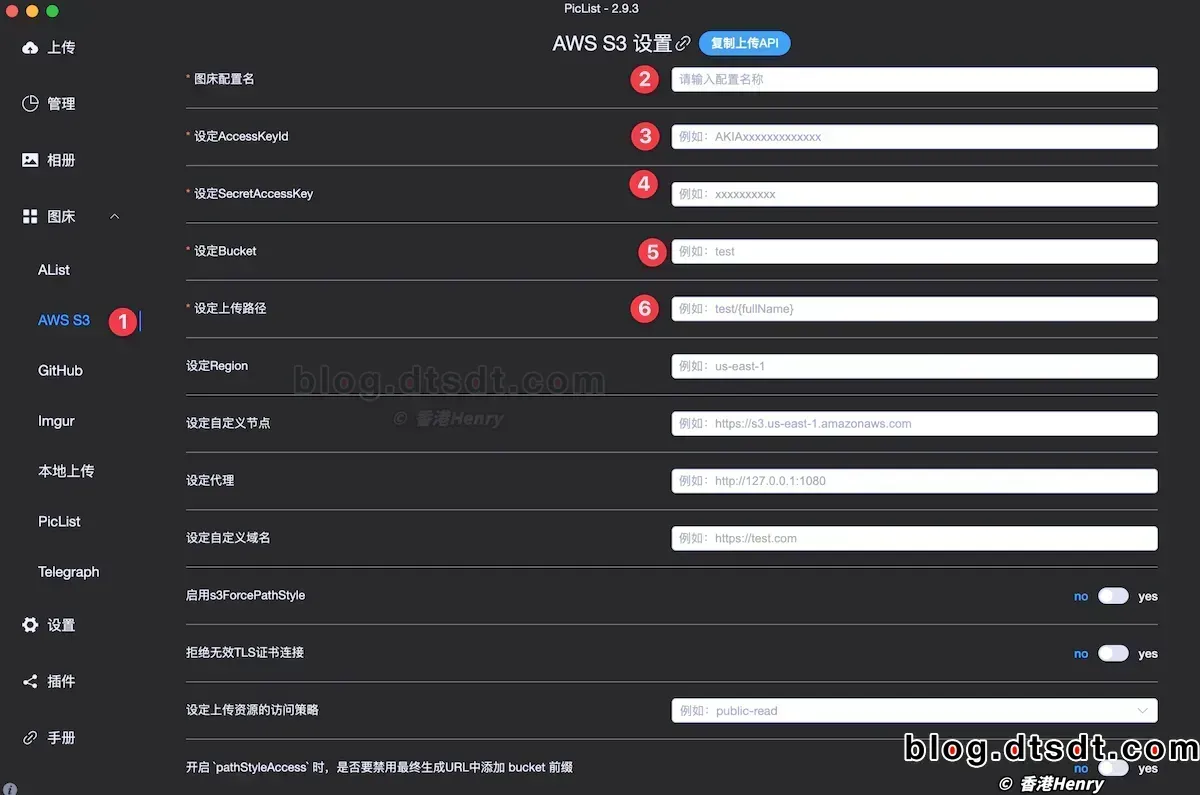
Other settings can remain as default. Confirm the parameters are correct, then click "Save" and "Set as Default Image Hosting" to finalize.
Restart Piclist to apply the changes.
Step 4: Upload Images and Generate Links
- Go to the Piclist management interface and set the target path for the image hosting.https://images.dtsdt.com/mubuailujing.webp
- Upload images to the Cloudflare R2 bucket. Piclist will automatically handle the images and generate access links for you.
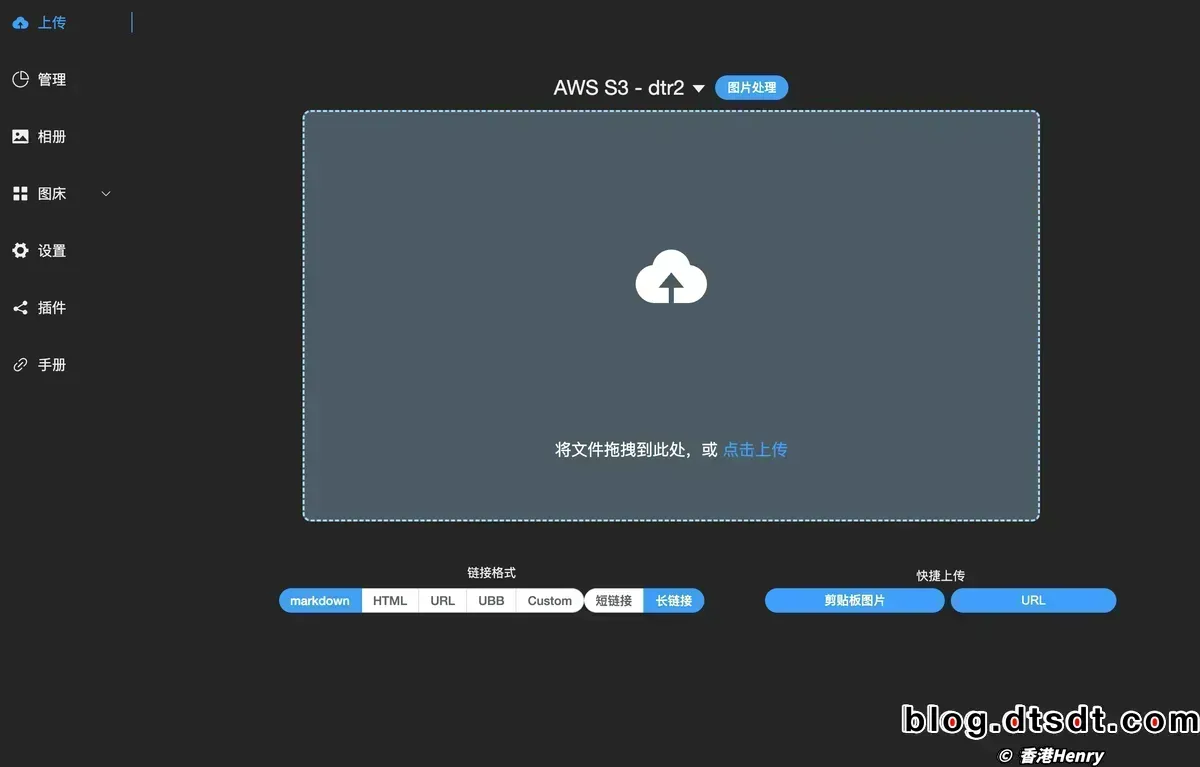
After the upload is complete, you can see the images in your Piclist album. Copy the generated Markdown or HTML links to embed them into your blog or website.
- You are now ready to focus on creating content.
FAQ
- Is Cloudflare R2 suitable for small personal projects? Yes, Cloudflare R2 offers flexible pricing and a free tier, making it suitable for small personal projects, especially those with a global user base.

- Can Piclist handle multiple image formats like GIFs? Yes, Piclist supports various image formats including JPEG, PNG, GIF, and WebP. Users can choose the format that best suits their needs.
- How can I ensure the privacy of uploaded images? Cloudflare R2 allows you to set bucket access permissions to ensure that only authorized users can access specific images. You can configure public or private access settings to maintain image privacy.
References
- Cloudflare R2 Official Documentation: Cloudflare R2 Overview
- Piclist Project Introduction and Documentation: Piclist GitHub Repository
- Best Practices for Image Optimization and Storage: Web Performance Best Practices
Conclusion
Combining Cloudflare R2 and Piclist, you can build a highly efficient, low-cost, and globally accelerated image hosting solution. Whether you are an individual blogger, a small business, or a developer needing to optimize image loading globally, this solution offers excellent storage and distribution experiences. With straightforward configuration, you can enjoy the benefits of R2's egress-free pricing and Piclist’s convenient image management, without the concerns of platform restrictions or excessive costs. This setup ensures you have ample space and security, with minimal worry about overage costs. For content creators, reliability, security, and efficiency are paramount—this combination delivers on all fronts. Get started with the steps outlined above and enhance your image hosting experience.
If you have any advanced usage scenarios or questions, feel free to leave a comment. The content will be updated in real-time.
上一篇
How united states credit cards can be transferred back to china through third party platform corsair orders
下一篇
2024Apple new product launch
- Author:HK_Henry
- URL:http://hkhenry.com/en/tech-tools/building-efficient-graph-bed-cloudflare-r2-piclist-configuration-guide
- Copyright:All articles in this blog, except for special statements, adopt BY-NC-SA agreement. Please indicate the source!
